Format tables in Excel with macros
If you copy a table from a browser, or some other application, and then paste it into Excel it most certainly looks bad. You may have cells with content that spans over several rows, and texts that are badly formatted. Luckily, with a simple macro in Excel, that works in all your documents, this is easily solved.
The problem
Copy this table and paste it into Excel:
| PlayerID | First name | Last name | Birth date | Notes |
|---|---|---|---|---|
| 1 | Alice | Aliceson | 1971-01-01 | Like rocks |
| 2 | Bob | Bobsson | 1972-02-02 | Never plays scissors |
| 3 | Carol | Carlsson | 1973-03-03 | |
| 4 | David | Davidsson | 1974-04-04 | Very experienced |
| 5 | Eric | Ericsson | 1975-05-05 | Beginner |
| 6 | Frank | Franksson | 1976-06-06 | |
| 7 | Georg | Georgsson | 1977-07-07 | |
| 8 | Henrik | Henriksson | 1978-08-08 |
It will look something like this:
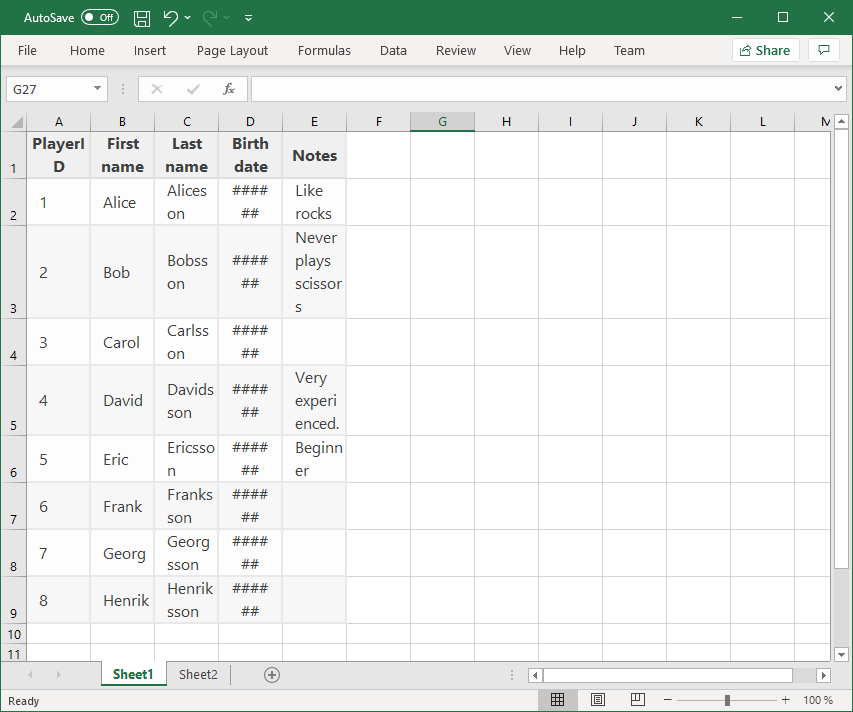
Not pretty. You may get a better result if you select Paste > Paste Special and then paste it as pure text. But still, there will be problems.
What I want is a shortcut to remove all formatting, make sure that the cells are
sized to the content and a table is created so it is easy to apply filters. Also,
since I often copy data from SQL Server Manager Studio, I want to remove the
string NULL automatically from all cells.
The solution
Macros are useful feature in Excel. You could include macros in your documents, but you rarely will have any need for that.
But macros could also be used in a personal macro file. This file is open automatically you have Excel open and is normally not visible. In this file you could have macros for things you do regularly.
If you follow this tutorial you will get two macros. One macro that makes your tables look pretty. And another macro that formats cells as dates. This is unfortunately lost when you run the first macro.
Create a personal macro workbook
Open Excel, and then go into the View tab and look for the Unhide button.

Could you click on that? Great, do so and then got further to next step Add some macros manually.
If the button is disabled, that means you have no personal file. The easiest way to create on is to click on View > Macros > Record Macro.

In Store macro in select Personal Macro Workbook. Then click OK.
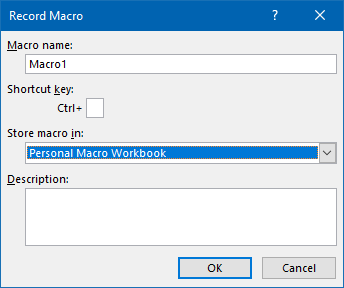
Now Excel is recording what you are doing and will generate code from everything you do. This is a great feature and I recommend you try it if you have not done it before. But for now, we just want to create a macro file. Therefore, select Macros > Stop recording.

Now you should be able to click on View > Unhide. Do so and select to unhide personal.xlsb.

Add some macros manually
Now when you could see the personal.xlsb file, select View > Macros > View Macros. If the file was just created, it will look like this:
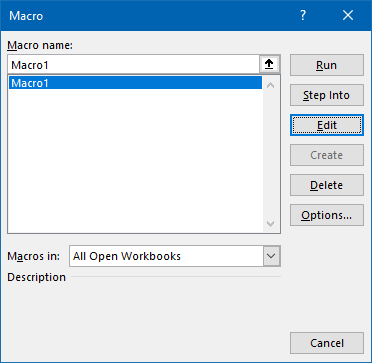
Now we will add some code. Select a macro and click on the Edit button.
Now the editor will pop up. This editor reminds me about Visual Basic 3.0 which I used to create my very first Windows applications and very long, long time ago. Good old days!
If all you see is an empty sub routine called Macro1, feel free to remove that. Then add this code in the editor:
Sub MakePrettyTable()
    ' Replace all cells there the content is exactly "NULL" with empty string.
    ' This for fixing content copied from SQL Server Manager Studio.
    Selection.Replace What:="NULL", Replacement:="", LookAt:=xlWhole, _
        SearchOrder:=xlByRows, MatchCase:=True, SearchFormat:=False, _
        ReplaceFormat:=False

    ' Remove all hyperlinks
    Selection.Hyperlinks.Delete

    ' Remove all formatting
    Selection.ClearFormats

    ' Make columns as wide as possible...
    Selection.ColumnWidth = 250
    ' auto fit the rows...
    Selection.Rows.AutoFit
    ' auto fit the columns.
    Selection.Columns.AutoFit

    ' Insert a table
    ActiveSheet.ListObjects.Add(xlSrcRange, Selection, , xlYes).Name = "Table"
End Sub

Sub SetShortDate()
    Selection.NumberFormat = "m/d/yyyy"
End Sub
The editor should look like this:
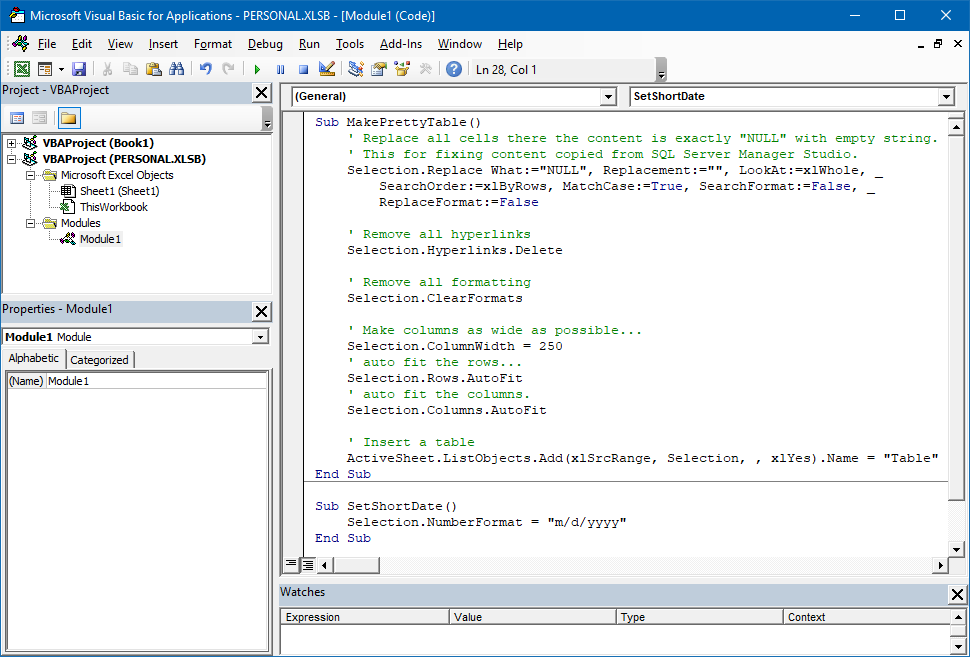
Close the editor and then you are back in Excel.
Assign shortcuts
Now we will make it easy to execute these macros. Again, in the personal.xlsb document, select Macros > View Macros. It should now look something like this:
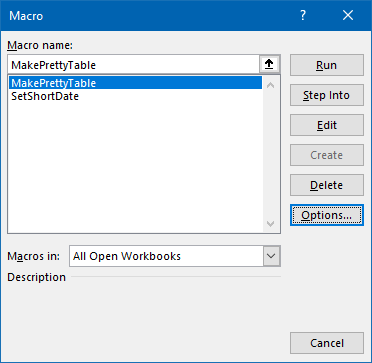
As you see, you could just select a macro and click on Run to execute it. This is fine for macros that you rarely use, but the macros we just added will be used a lot. Select a macro and then click on Options.
Select the Shortcut key and enter a shortcut you want to use. Ctrl is
mandatory, so press Shift + P if you want to have the shortcut
Ctrl + Shift + P. I used that for formatting table, and Ctrl + Shift + D for
setup dates.
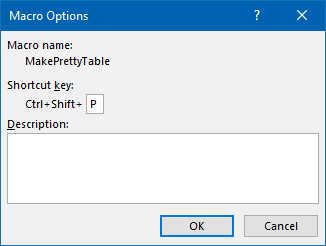
Click OK and you are back to the list. Assign another shortcut to the other macro and then close the settings.
Hide personal macro file
Now when the macro file is configured it is time to hide it. In the personal.xlsb document, select View > Hide.

If you forgot to do this, two files will be open every time you open an Excel file. This might drive you crazy.
Try it
If you have followed this tutorial you should now be back in your original document with the bad looking table.
Select it (just make a cell in that table and press Ctrl + A) and then press
the shortcut you assigned to your macro. I used Ctrl + Shift + P. Now it looks
like this:
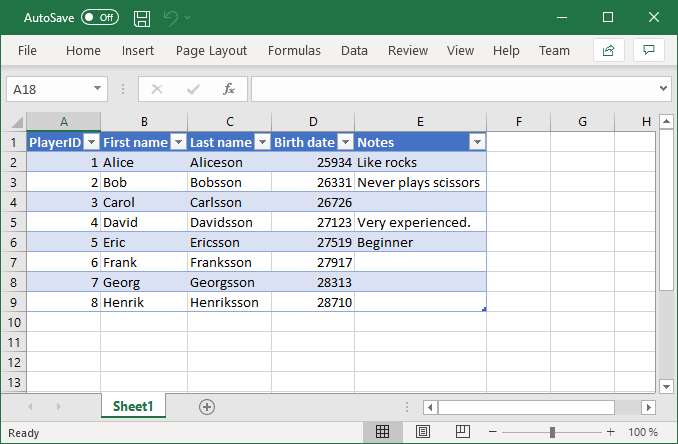
As I mentioned earlier, all the data formats have also been lost so the dates
now looks like numbers (the number of days since 1 January 1900). Therefore,
select the Birth date column and press your other shortcut. I used
Ctrl + Shift + D.
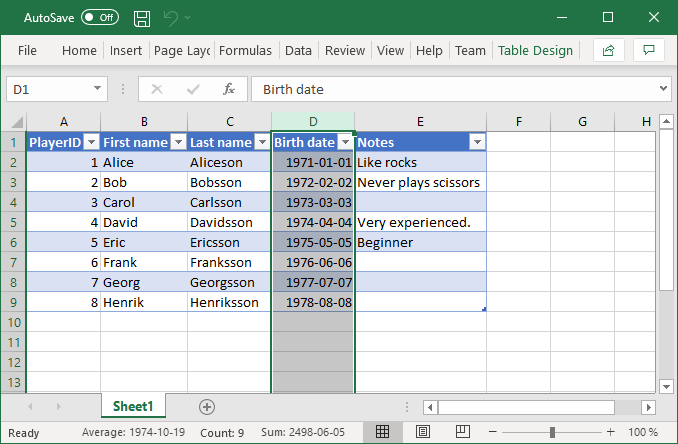
Now it looks perfect!
Summary
Almost every day I have some data that I either need to analyze or share with someone and then I use these macros. It makes me focus on more important things.
I am a bit annoyed that the data type settings are lost. This is due the Selection.ClearFormats command in the macro and I have not found a way around but.
But if you paste the content as text then that step is not necessary. The following macro paste the content as text and then formats the table. In some scenarios, this is a better solution.
Sub PasteAsTextAndFormatTable()
    ' The format us "Unicode Text" if you run Excel in English.
    ' It might have another name in other languages. In Swedish it
    ' is "Unicode-text"
    ActiveSheet.PasteSpecial Format:="Unicode-text", Link:=False, _
        DisplayAsIcon:=False

    ' Replace all cells there the content is exactly "NULL" with empty string.
    ' This for fixing content copied from SQL Server Manager Studio.
    Selection.Replace What:="NULL", Replacement:="", LookAt:=xlWhole, _
        SearchOrder:=xlByRows, MatchCase:=True, SearchFormat:=False, _
        ReplaceFormat:=False

    ' Remove all hyperlinks
    Selection.Hyperlinks.Delete

    ' Make columns as wide as possible...
    Selection.ColumnWidth = 250
    ' auto fit the rows...
    Selection.Rows.AutoFit
    ' auto fit the columns.
    Selection.Columns.AutoFit

    ' Insert a table
    ActiveSheet.ListObjects.Add(xlSrcRange, Selection, , xlYes).Name = "Table"
End Sub