Create a time lapse video
Let’s create a time lapse video! We take some images, add some title screen background audio and a time stamp on each frame and combine all that to a video file. All this in C# and some help from ffmpeg.
ffmpeg is an open source tool that is very often used to
generated video and it is available on several platforms. It can do a lot of
things but is a bit tricky to use in my opinion. If you are using Windows, you
need to download the tool and have it on some well-known place. A good thing is
that you only need a single file - ffmpeg.exe. If you are using some other
platform you probably found some other way ;-)
The end result looks like this:
Maybe not to exiting :-) But replace this with some proper photos and it will be more interesting, I promise!
Strategy
The complete code is aviliable on my GitHub project Time lapse creator. It is just about 500 lines of code, and I hope it is easy to understand. Here I explain what the application does.
Step 1 - Get the images
In the first step the path to all the original images will be found. This is
done in the method GetOriginalImagesAsync. In this demo code the images will
be autogenerated instead. They look something like this:


Step 2 - Create title screen frames
Every professional movie has a title screen. This is generated in the method
CreateTitleScreenAsync, and the images looks like this:



As you see the text will be faded in. I solved this but creating each frame individually. Another way to solve use to use the fading options when the movie is rendered.
Step 3 - Create frames from images
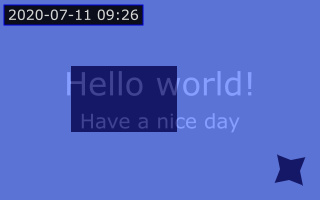
Our original images are just pure images. But sense we are making a time lapse we
want to add a visible timestamp on every frame. Also, we want to fade
from the title screen. This is done in the method CreateOverlayImagesAsync,
and the images then look like this:



Step 4 - Create a thumbnail image
It is nice a have a thumbnail image added to our movie. This is then used for
instance in Explorer to give you a hint what the movie is about. This image is
created in CreateThumbnailImageAsync and look like this.

Note the thumbnail image in the final video is not used in a video element in
a HTML element. Instead you should define the thumbnail image in the poster
attribute like this:
<video controls poster="thumbnail.png">
  <source src="movie.mp4" type="video/mp4">
</video>
Step 5 - Render the movie
Now when we have everything in place, we will let ffmpeg do the work
for us. This is a bit complicated, but the method RenderVideoAsync takes
care of all of the hard stuff. Note that you need to know were ffmpeg
is located.
Summary
This was very fun to do but it took me forever to get everything right. There
are NuGet packages available that makes it a bit easier to use ffmpeg and I
tried a couple of those in the beginning. But I ended up doing it myself, after
all it is just a command line application, so it is quite straightforward if you
just get the arguments right.
One thing I found out the hard way is that you cannot mix different image formats when you are rendering the video. For instance, you cannot have both JPEG and PNG files in your file list.
Rendering video locally could be fun, but I have also used similar code in Azure Functions to autogenerate movies. You could read more about this in my follow-up post.