Test migrations on production data
Running database migrations on a SQL server could be scary. Even if your migrations scripts work perfectly fine on test server, there might be data on your production servers that could cause problems. Wouldn’t it be nice if you could copy data from your production servers and then test the migrations on that? Of course, this should be fully automated, and you can do this with Azure DevOps.
Prerequisites
Before I explain how to do it, I assume that you have got migrations script as output from your build pipeline (if you are building for .NET Core check out my task Entity Framework Core Migrations Script Generator). I am also assuming that your database is not crazy big, because then you might run into timeout issues. I am also assuming that you have some experience with Azure DevOps.
Strategy
The idea to solve this is quite easy:
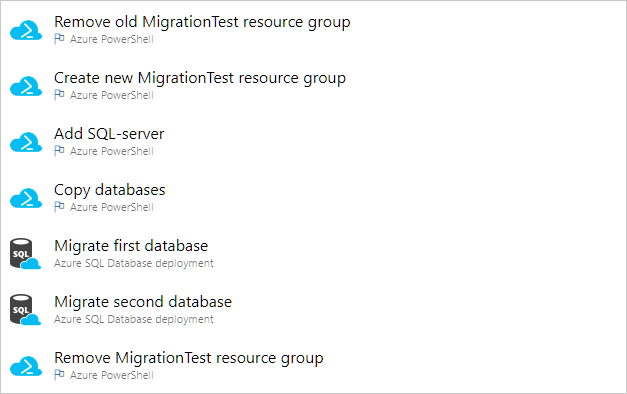
- Create a new clean temporary resource group.
- Add an SQL server.
- Copy the data from your production servers (or a backup) to your new SQL-server.
- Run the migrations.
- Remove the resource group.
That is all. If some step is failing, you will be able to see what went wrong in the pipeline. Unfortunately, there is not much build in support to do thing like this in DevOps. So, we will use some PowerShell scripts to fill up the gaps.

Add stage
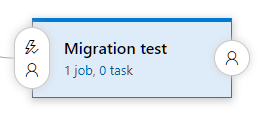
In your release pipeline, add a new stage. I am calling my stage Migration
test.

Add Azure PowerShell
Add a new task to your pipeline. Search for Azure PowerShell. We will use this many more times.

All PowerShell tasks should be configured like this:
Azure Subscription: The subscription you want to use.
Script Type: Inline Script
ErrorActionPreference: Stop (except in the first task)
Step 1 - Remove resource group
If a previous migration test has failed, we will have resources left in our resource group. Therefore, the first step we will remove any potential existing resource group. The PowerShell script will use Remove-AzResourceGroup like this:
Remove-AzResourceGroup -Name MigrationTest -ForceIn this tutorial I will assume that the resource group we will be using is called MigrationTest.
Also, configure ErrorActionPreference to have the value SilentlyContinue. This makes sure that
the pipeline moves on to next step even if this step fails (which it will to most of the times).
Step 2 - Create resource group
The next step is to create a new empty resource group. You do it like this in PowerShell. This is done with the PowerShell command New-AzResourceGroup like this:
New-AzResourceGroup -Name MigrationTest -Location "North Europe"The location should be the same as were your original database is. Read the documentation to see all locations.
Step 3 - Create SQL Server
In the third step it is time to spin up a SQL server we could use host our database. Normally I should recommend ARM template to deploy infrastructure. But in this scenario we use the PowerShell command New-AzSqlServer instead:
$adminSqlLogin = "SqlAdmin"
$password = "SetAProperPassword!"
$serverName = "mymigrationtestserver"
$resourceGroupName = "MigrationTest"

New-AzSqlServer -ResourceGroupName $resourceGroupName `
    -ServerName $serverName `
    -Location (Get-AzResourceGroup $resourceGroupName).Location `
    -SqlAdministratorCredentials $(New-Object -TypeName System.Management.Automation.PSCredential -ArgumentList $adminSqlLogin, $(ConvertTo-SecureString -String $password -AsPlainText -Force))
This will create an SQL Server with the name mymigrationtestserver (you should use another name) in the resource group Migration test that we just have created. I have written to password in clear text to keep this simple, in real life you should have this in a variable or getting it from a keyvault for instance.
I have more or less copied this from the documentation. Read more about that if you want configure firewall settings and other settings.
Step 4 - Copy databases
Now it is time to copy your databases. We are using PowerShell command New-AzSqlDatabaseCopy:
New-AzSqlDatabaseCopy `
    -ResourceGroupName SourceResourceGroup `
    -ServerName sourceserver `
    -DatabaseName MyDatabase `
    -CopyResourceGroupName MigrationTest `
    -CopyServerName mymigrationtestserver `
    -CopyDatabaseName MyDatabaseClone
That script will go to the resource group SourceResourceGroup and to the server sourceserver and copy the database MyDatabase into the resource group MigrationTest into the server mymigrationtestserver into a new database name MyDatabaseClone.
If you have more databases you want to copy, just add a new command in the PowerShell editor or create a new task.
If you make backup ups from your databases, you probably have bacpac-files in some storage account. You could use these instead of copy data from your production servers. Read more about New-AzSqlDatabaseImport in the documentation.
Step 5 - Apply migrations
In this step it is finally time to the actual migrations. You should use this Azure SQL Database Deployment for this. Since you are reading this, I guess you able to configure this. Add one task for each migration.

Step 6 - Remove resource group
If everything has went well so far, it is just some clean ups left. We will just remove our temporary resource group, again using the PowerShell command Remove-AzResourceGroup:
Remove-AzResourceGroup -Name MigrationTest -ForceSummary
As you could see this is quite straightforward to do. As I mentioned earlier, it will take some time to run this. But in many cases I think it is worth it.