Setup a NuGet feed in Azure DevOps
With Artifacts in Azure DevOps you could easily setup a private NuGet feed. Here is a summary of the steps required for different scenarios from a .NET Core developer perspective.
Publish NuGet packages
First, we create a feed and then we publish out NuGet packages.
Create Feed
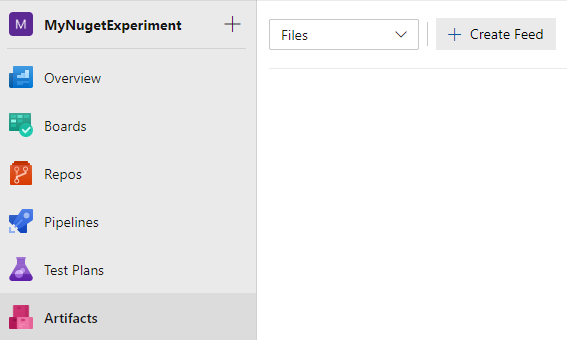
In Azure Portal, open Artifacts and click on Create Feed.

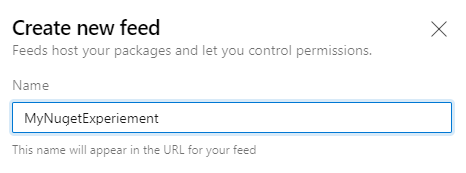
Enter a proper name and then select Create.

Done. :-) While you are here, click on Connect to feed and find the URL to the feed. You will need this in the following steps.
Next step is to publish NuGet packages. You can do this either in a DevOps pipeline, or locally.
Publish NuGet from DevOps
In your pipeline, add a new .NET Core task and then select command pack and configure the other options.
Now you could publish (or push as the say) the created NuGet packages. They are two ways to do this.
Option 1
In your pipeline, add a new .NET Core task and then select command push. Select the feed in the Target feed option.
The downside with this option is that you will get an error if you trying to publish a version that already exists. Not uncommon I guess if you have several libraries in your solution but only one has changed. There has been proposed a fix for this but it got rejected.
Option 2
If you want to avoid errors if you try to publish a NuGet packet version that already exists, use this instead.
In your pipeline, add the task NuGet Authenticate. You do not need to configure anything.
Next, add a Command line task and use the following script:
dotnet nuget push --api-key AzureArtifacts --skip-duplicate --source https://pkgs.dev.azure.com/pekspro/MyNugetExperiment/_packaging/MyNugetExperiement/nuget/v3/index.json $(Build.ArtifactStagingDirectory)/*.nupkg To find the URL to use, go to Artifacts, select your feed and then Connect to feed.
Publish NuGet locally
Strangely, there is no option to upload NuGet packages from the web portal. At least I have not found a way to do so. But you could to it by using the command line.
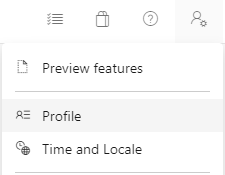
The first step is to create a personal access token. In the portal, open your profile.

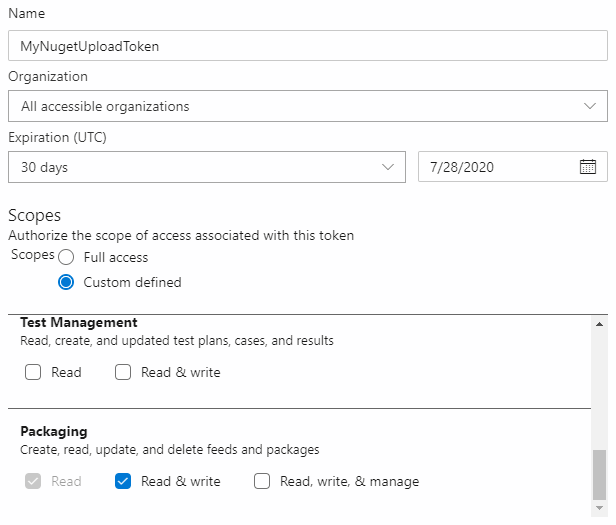
Then, in the menu select Personal Access Token and then New Token. Enter a name, and under Scope - Packaging select Read & write.

Copy the access key, open a console, and run this command.
dotnet nuget add source https://pkgs.dev.azure.com/pekspro/MyNugetExperiment/_packaging/MyNugetExperiement/nuget/v3/index.json --name "MyGetFeed" --username [Your e-mail address] --password [The access key]To find the URL to use, go to Artifacts, select your feed, and then Connect to feed.
If you later want to remove your feed, run this command:
dotnet nuget remove source "MyNugGetFeed"Now to the fun stuff. To upload a NuGet package, run this command:
dotnet nuget push .\MyNugetLibrary.1.0.0.nupkg --source "MyNuGetFeed" --api-key whateverNote that you have to enter an api-key, but the value does not matter.
Consume NuGet packages
When the feed and the NuGet packages are in place, we make sure we could consume these in our projects. Both locally and in our build pipeline.
Consume NuGet packages locally
If you have configured your system to be able to upload NuGet packets from the console, as described earlier, you should also be able to consume NuGet packages locally. Otherwise I suggest you to look on the options on Artifacts - your feed - Connect to feed.
In most cases the best option is add a nuget.config file to your project, in the same folder as your .csproj or .sln file. It should look something like this:
<?xml version="1.0" encoding="utf-8"?>
<configuration>
  <packageSources>
    <add key="MyNugetExperiement" value="https://pkgs.dev.azure.com/pekspro/MyNugetExperiment/_packaging/MyNugetExperiement/nuget/v3/index.json" />
  </packageSources>
</configuration>
In whatever way you have configured the NuGet package source, you should now see it in Visual Studio.

Setup your pipeline
In your pipeline, select the Restore task and look for the Feeds and authentication options. Here you could select to use the sources from nuget.config file, like suggested in previous step. But you could also select the feed like I have done here:

Summary
I just recently learned how to configure a NuGet service, and I must say this was easier than expected. There are some steps that could be improved, especially when it comes to publish NuGet packages, but the workarounds are not too bad.
I have not check what to do if you are using .NET Framework, but many of the steps should be similar if not the same.
More information about Artifacts is found in the documentation.