Redirect with Azure CDN
A while ago I needed to make a redirect from www.oldcomain.com to www.newdomain.com. This needed to be done with the HTTP status 301 – moved permanently. I could not do this with the service that was hosting the new address. But I found a cheap solution in Azure CDN.
The problem
Let say you want to redirect a domain. Maybe one of these scenarios:
| Old domain | New domain |
|---|---|
| www.olddomain.com | www.domain.com |
| www.newdomain.com | domain.com |
| domain.uk | domain.co.uk |
In many cases you could solve this on the service that is hosting the server. But what if that is not an option?
The solution
Azure CDN is a content delivery network you could use to make sure you have content closer to your users. This could reduce bandwidth on your services and reduce loading time for your users.
But it also has support for redirecting request, and this is what we will use. Once we have setup everything this will happen when the old domain is requested in a browser:
- The browser will use DNS to get the address to server. There will be CNAME entry here that will redirect to browser to an Azure CDN service.
- The Azure CDN service will have a rule to redirect the browser to the new domain.
- The browser will be redirected to the new domain address.
Create a CDN service
In Azure, search for CDN, and select to create the service:

Setup up the service. Give it an appropriate name. To save some time, select Create a new CDN endpoint.
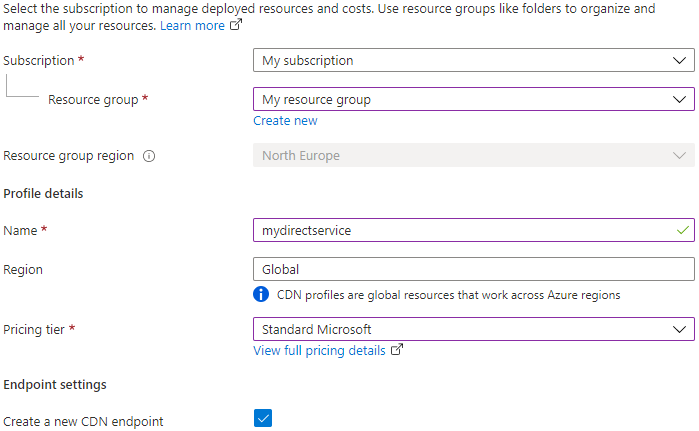
In the endpoint settings, you first need to setup which domain name in should
have in Azure. It must end with azureedge.net. Later we will hook up your
domain to this.
You also need to setup your origin type. In a normal CDN scenario, this is where Azure will fetch data and distribute to your users. But we will just use the redirect service, so this does not matter. To make is simple, select Custom origin and enter some hostname.

When this is completed, create the service.
Test the service
Once the service is created, you should be able to test it. If you enter the
domain you wanted to use in a browser, redirectme.azureedge.net in my example,
you should see the origin loaded (example.com) but with the domain you
entered. Note, it may take several minutes (10 – 30 minutes) before this works.
Configure redirect
Next step is to configure the redirect. In the CDN service you have created you should see the endpoint you have created:

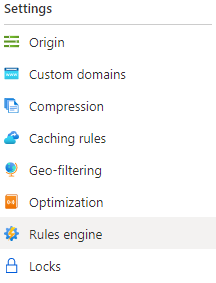
Select the endpoint in the list. Once it loaded, scroll down to the settings and select Rules engine.
The rules engine you could create several complex rules. The only thing we will do is to select a redirect action in the global rule:
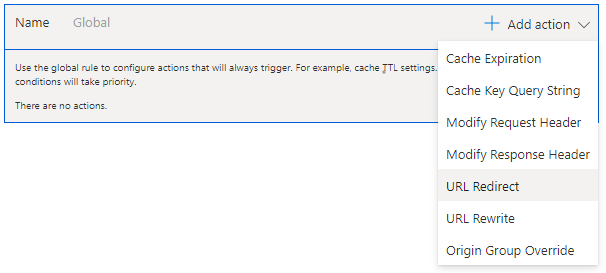
Select type to Moved (301) and in the hostname enter to which domain the user should be redirected. Once you are done, click on Save.
Now, you could verify that you now are being redirect to the new domain by
testing the domain in a browser (redirectme.azureedge.net in my example). The
domain that you have entered should be replaced. Again, note that it could take
several minutes (10 – 30 minutes), before this works.
Configure domains
Next step is to configure your domains. I will use the DNS services in these
samples, but it should not be hard to transfer this to other services. You will
need to make some different settings, depending on if it is an apex/root domain
(like example.com) or if it is an subdomain (like www.example.com).
Configure apex domain
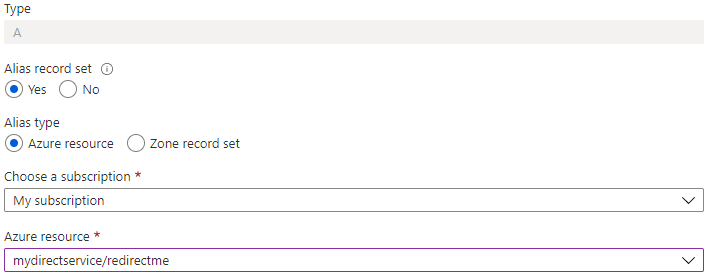
If you have an apex/root domain, configure it to be an alias and set it up to use your Azure CDN resource.
Configure subdomain
If you have a subdomain, then type should be a CNAME and the alias should be domain to the CDN resource.

Configure CDN to use custom domain
Next step is to configure the CDN to use the custom domain. In the settings section, select Custom domain:
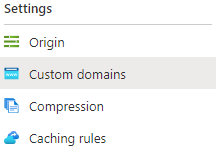
Add the domain the end user should use:

Again, after you added the domain, it could take several minutes before. But when it works you should be able to verify that redirect now works in your custom domain in a browser – but only when http is used!
Add support for https
Must browser now warn you if you are not using https, so it is better to add support for this. In the custom domain list, select the domain you just added. Then enable Custom domain HTTPS. If you do not want to handle the certificate yourself select CDN managed. Note that this only works for subdomains, you need to use your own certificate for apex domains.
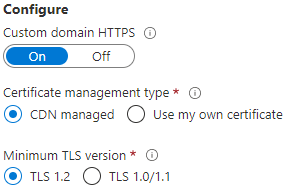
Once you are done, select Save. Again, it may take some time before everything was applied.
Summary
There were some steps to solve this, I hope it is not too hard to follow. It is quite logical once you have done it. What is great with this solution is that is close to free.
